Showing posts with label Stamp Carving. Show all posts

Monday, January 10, 2011

My Crafty Christmas

I'm back!  My bloggy friend Jamie reminded me that it's been a month since I've last posted.  Oops!  Not really what I intended to happen, but you know how things kind of get away from you... Good thing I have people keeping up with me, or you'd all still be left without my wonderful internet presence ;)

I thought a good way to get back into the swing of blogging would be to let you in on what I've been up to in my time off.  It seems like things have been going non-stop since Thanksgiving.  We hosted this year's Thanksgiving dinner at our house this year, and it went off well, but as soon as it was over Christmas kind of took over and then before I knew it, Christmas was over, and then it was time for New Years, when we had our friends over for a couple of days. And then we had Stephen's birthday this weekend.  Whew!  Lots of activity - it was all a blast though.

Don't worry - I did manage to get some crafting done during my busy time!  Here's a quick rundown of what I did.

First of all, I promised my mother-in-law I'd take a picture of our Christmas tree for her so here it is (Sorry for the delay Suanne!)  I made sure to take the picture before I shipped off all the gifts.  It was pretty bare under there for most of the time we had the tree up.


And here are a few close ups of my handmade ornaments in action:


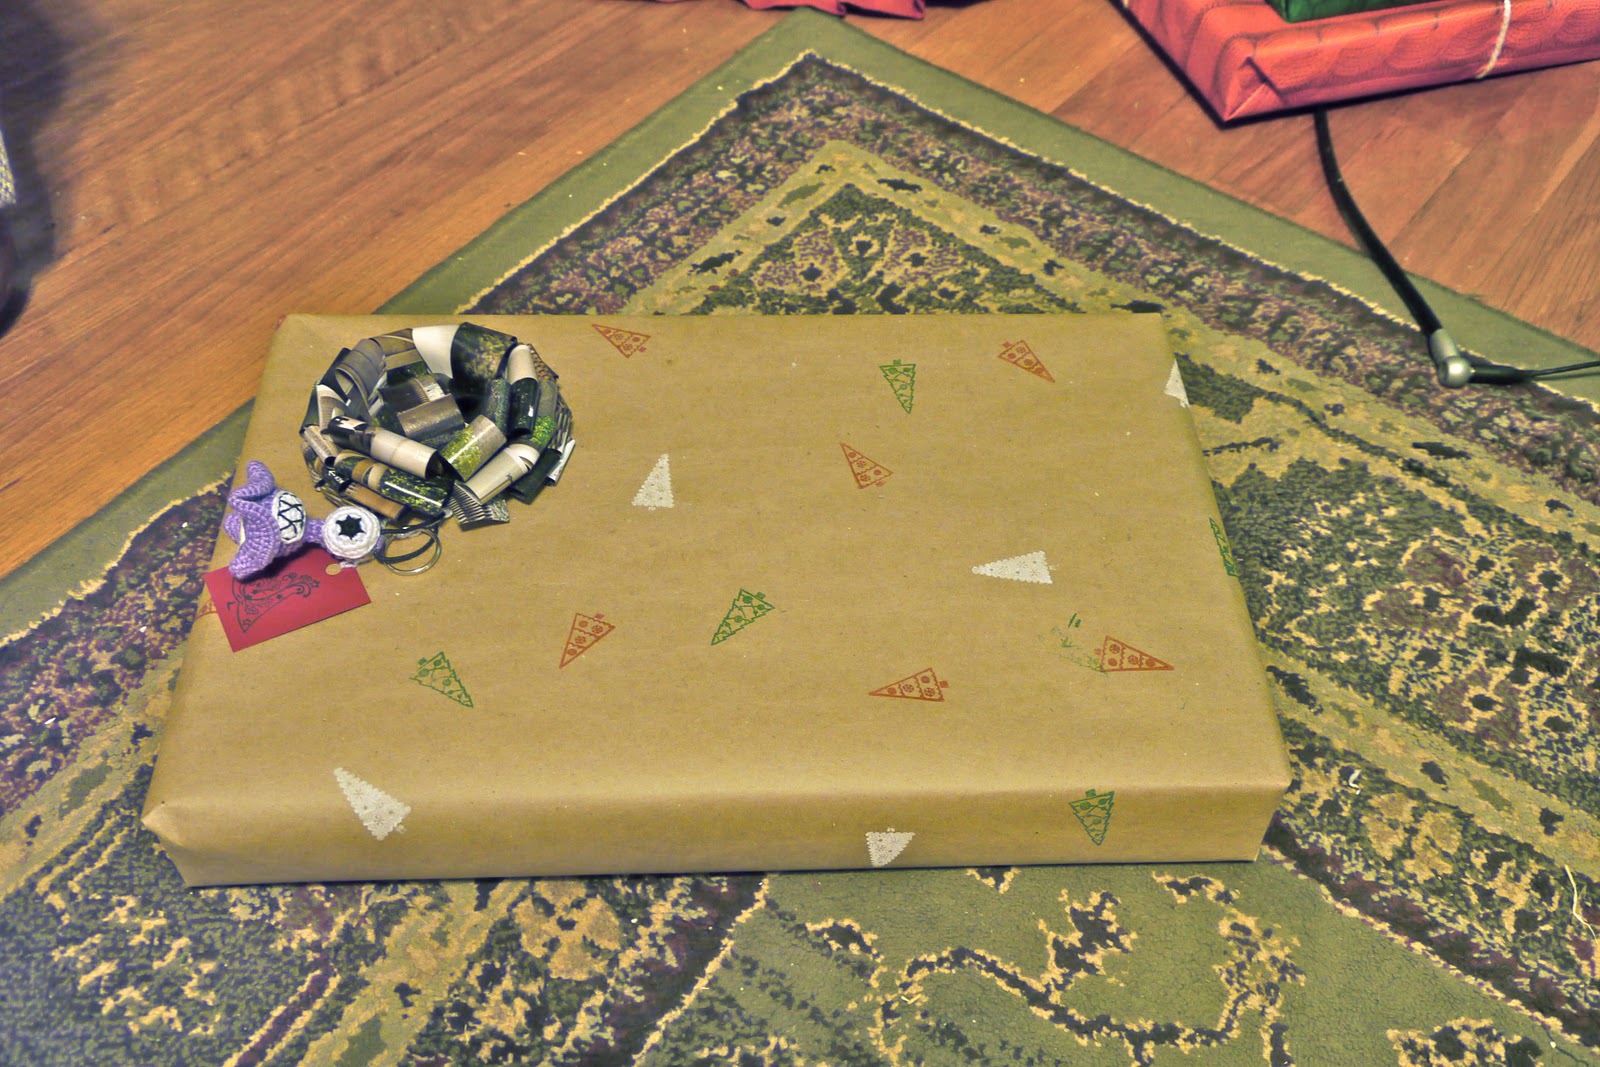
For my gift wrapping, I made a big roll of hand stamped kraft paper.  It came out so cute!  I love it!  I also used a bunch of hand made gift bows on my packages.  I think I'll post a tutorial for the bows one of these days.  They are pretty simple and cute! Here's a close up of the paper and bows:

Just curious, but did anyone else fall in love with this sweater wrapping paper in the dollar bins at Michael's as much as I did?


Oh my goodness!  It's so cute!  I had to keep myself from buying like 50 rolls of it.  I also decided to put yarn bows on all of my presents I was shipping this year, that way it wouldn't make a difference if my bows got squashed in the mail.  Great idea right?  Oh, and I don't think I took any photos of the gift tags, but they are all handmade too, you can see them a little in my present shots.

Here is my stack of gifts at it's most impressive looking point.  Beautiful!! Well, at least I think so.  Maybe next year I'll just wrap up a bunch of dummy boxes to put under my tree so I can look at a cheery pile of presents for more than a few hours.


Next, here are the Christmas cards I made for my co-workers this year.  It is important to me to give handmade Christmas cards, but my list is just too long.  So for the past couple years I've made up just enough for work people, and everyone else gets the pretty photo cards.  Here's this year's card:


A cute little forest of trees!  Here is a closer shot:


I sewed fabric scraps onto card stock using my sewing machine, then stitched around the edge and then sewed a few button ornaments on each one before sticking the card stock on to a blank card.  Then I put a hand stamped message on the inside:


Ahh!!  I'm totally in love with how they came out!  Sooooo cute!  (Sew cute?)

And, since I never posted it, here's the 2009 model:


Kinda the same idea but with a hand carved tree stamp instead (all the ornaments were mini hand-carved stamps too!)

Let's see... What next.  How about the crafty gifts I made.  I'll start with the nesting doll pillows I made for my mom and my sisters.  We've kind of got a running nesting doll gift thing going in our family, so it seemed appropriate.  I made these from a pattern I made up all by myself.  Go me!  I've still got a couple more to make, but I just couldn't get them done in time for Christmas.  Here are the ones I did get done.


Cute right?  Then this set of note cards went to my aunt.  These were kind of fun to make because it isn't 4 individual stamps, it is one stamp inked with 4 different colors.  That was kind of tricky!


My sisters-in-law each got one of these cute boxes:


Which held cute earrings!  I'm learning how to make jewelry now - Yay!


And my nephew got a stuffed "One Yard Wonders" dinosaur.


And my mother in law got a cute flower pillow (I love this pillow so much!  I have one of my own on my guest room bed! I've actually got the photos to post a walk through for this one - hopefully I'll get it up soon.)


Then, my niece turned 3 last week so I made her this cute card:


To accompany her new handmade fishing toy!


This was really fun to make!  This project was inspired by From An Igloo.  What a great idea right?  It's little stuffed fishies (I just sketched out a simple fish pattern).  Each fishy has a washer attached to it's nose, and there is a magnet inside the felt worm.  I kind of wanted to keep it to play with on my own.  Stephen demonstrated the proper fishing technique for me.


I also stitched up a quick drawstring bag for her fishies to live in.  I found the perfect fish fabric at Hobby Lobby too!


That's about all I've got!  And that's only the stuff I remembered to take pictures of! I'm exhausted just thinking about it... :)  And just for fun, and because Stephen took these photos, and I forgot about them, and I don't usually post photos like this here, here are a few pictures of me hard at work.

This is me making cards at my crafting table crafting table - it is usually about this jam packed full of stuff.


And here I am sewing buttons at the sewing table.  Wine is always a good accompaniment for crafting!  And this is my standard crafting attire.  Gotta love the pj pants!


Here's to a new year of blogging!  Hope it's a good one!

Friday, October 1, 2010

Do it yourself Jack-O-Lantern Stamps

Happy October!  Fall is finally in the air, and all I want to do is go to Bath and Body Works and smell all their autumn scented candles - feel free to send me any of those if you want. 

Also, today is my dad's birthday, so happy birthday to him :)

To start off the month of October, I thought I'd share with you a cute little set of stamps I carved last year.    I really like stamps with multiple parts that can combine in unique and different ways for each person that uses them, so I came up with the idea for some "carve your own jack-o-lantern" stamps.  Here are all the pieces:


I know it's a little silly, but I'm still super impressed with myself for that pumpkin.  I drew that myself!  I know right?  Ok - it's not a masterpiece, but I think it looks close to what a real pumpkin looks like, and life-like drawings is not something I claim on my list of skills...

Here's a sample of some of the fun jack-o-lanterns you can create with this stamp set.  You can go cute or scary.  Whatever you like.  And it will be easy to add elements to it whenever I want!  It takes like 5 seconds (exaggeration) to carve a new eye or nose stamp.  Hey!  I just realized something - I literally carved these jack-o-lanterns, just out of rubber instead of an actual pumpkin!  Ok, never mind - it was much funnier and more clever in my head than typed out on here.


After I carved them I made this little set of Halloween cards.


However, I forgot to give them out to anyone.  Oops.  Maybe I will remember about them this year.

Monday, January 11, 2010

Merry Christmas to all and to all a good night!

I know it's not Christmas anymore.  The decorations are packed away, and the sense of holiday cheer is gone.  It's not a winter wonderland outside anymore, it's just cold. What better time to share some of the great projects I made for Christmas this year?? Other than before Christmas that is...

PROJECT 1:  Quilted Ornament

I came across this project one day when I was really excited about making Christmas ornaments.  I think it would be such a cool thing to have a tree FULL UP with hand made ornaments.  This project takes a little time but it really is simple.  All you need is a styrofoam ball, some 3x3 squares of fabric, pins, ribbon and a glue gun.  Also you have to be able to fold things.  I hope that isn't a problem for you.  I wish I could remember the exact tutorial I used to make this ornament, but I can't.  There are plenty of great ones out there on the internet though, so if you want to make your own go ahead and google "quilted ornament" or something of the like.  I know my star in the middle is a little jacked up and very uneven, but let's go ahead and call it "abstract".

PROJECT 2:  Ribbon tree

This project came off of the Michael's website.  Which happens to be where I bought all of my supplies!  Oh wait - not the glittery red star.  This project is basically the same concept as the quilted ornament, except even easier!!  It's just a bunch of 3" pieces of ribbon, folded in half, and pinned to a Styrofoam cone!  So easy and soooo cute! Here's a picture of all your supplies* (again except for the glittery red star):

*Daiquiri not required 

I was super lucky to come across the red glittery star at Joanns.  I had no idea what to stick in the top of that darn tree, until I found a whole bin of glittery things on wires, perfect for sticking in to the top of a Styrofoam cone!  Hooray for me.  I guess I really wasn't that lucky, just super clever!

PROJECT 3:  Not really hand made ornament

Cheating! 

This is not really a hand made craft.  I ordered it using free money I had on Kodakgallery.com.  I did create it myself though...

PROJECT 4:  Tree Stamp
 
I carved this really neat Christmas tree rubber stamp.  It took FOREVER to carve out all the little spaces on it, but I'm glad I did because I used it for another great project (of which I don't have any pictures uploaded to the computer yet).  More on this later!

That is all for now.  I know I've got some more pictures stashed away somewhere, so I'll put those up a little later.  I hope you enjoy my Christmas projects, maybe next year I'll start earlier though...


Monday, December 7, 2009

Becky's Birthday Stamps: Don't you wish your sister was hot like me?

Back at the end of October my little sister Becky had a birthday.  I didn't know what to get her, but I knew I wanted to make her something.  Becky like a lot of really weird quirky things, so I thought it might be fun to carve her some unique stamps of her favorite things that no one will ever find in a store. 
I'm really really happy with how they turned out!  I don't recall if I said this before, but in my opinion the only thing that is hard about carving stamps is the drawing part - the rest is just tracing.  Lucky for me I'm semi-decent at drawing cute little pictures.  At least I think so!  So let's get this show on the road:


First off, we have the Kardinal stamp (left) and the Walugi stamp.  Kardinal is Becky's alter-ego (I think!) She has red hair and wears a cape and can fly (maybe not...).  Waluigi is one of the newer characters from the Mario games.  I think he first showed up in the N64 game Mario Tennis and he is a bad guy.  I don't understand why her favorite characters are all bad guys, but hey, it wasn't my birthday present!


Next we have the symbol from Kardinal's forehead (right) and the RTF symbol.  This symbol is from Becky's original fiction she is writing, but I haven't read it, so I don't really know what it stands for.  All I know that it is something she really likes, with a fairly simple design, so I definitely had to include it.

This one is my favorite of the birthday stamps!  It's the interlocking BD!  If it is not instantly obvious to you, it is a play off of the interlocking BU of Baylor University (please don't sue me Baylor!).  Becky has had to live with the nickname BD for a long time now.  Becky progressed into BD like this: Becky => Bookie (Boo-Key) => Book Dog => BD.  Makes perfect sense right?  I guess it does if you're my brother at least.  Note that is Boo like a ghost, not like a book.  Also, although I wish I could take full credit for this awesome idea, Stephen actually thought of the interlocking BD.


Last but not least is the Piggo stamp.  I had a few small pieces of speedy carve left  and Piggo was quick and easy.  FYI Piggo is a plastic pig that came out of a quarter machine.  You can find out more about him here.
 
After I finished carving the stamps I sewed little fabric "cases" for them out of scrap fabric and stamped them for easy identification.  Then they were loaded up in a cute little wooden box from Michael's (FYI - never ever buy anything full price from a big chain craft store.  There are ALWAYS coupons available somewhere, especially if you can wait a few days!)

I may be getting a little cocky here, but I'm pretty sure this was the best birthday present ever!  Plus it was super fun to make!  Happy Birthday little sister!!

 
Hooray for quirkiness!

Wednesday, December 2, 2009

Big B: My very first stamp


I think stamp carving is so cool.  I love it!  I learned about it from my old boss, Sha, because he carves stamps for letterboxing (a fun hobby!  Look it up!).  A long long time ago, back in my Plano days, I bought Stephen a Speedball stamp carving kit since he was getting interested in letterboxing.  Well that darn kit sat around in his room for months and months and months.  I guess he just wasn't interested in the crafty side of letterboxing.   I haven't bought him a surprise since*.

As you may know, I married this non-crafty guy this past July.  We decided to print the programs ourselves to save some cash.  We didn't want to just hand everyone a folded piece of paper, so we decided to do a card stock cover sewn to a piece of pretty computer paper with the order of service printed on it.  We wanted to put something on the cover of the program but couldn't put the card stock through the printer so a nice stamp seemed like a good idea, and we wanted a big B (for bunnies, butane, and broccoli).  We searched around and couldn't find any big enough or good looking enough. Lucky for me that stamp carving kit was still sitting around!  We found a font we liked on the computer, sized it just right and transferred the image onto the pink stamp carving material! FYI, stamp carving is really pretty easy, especially for basic shapes.  It's just tracing!

Anyways, the stamp came out great, and I love how our programs turned out! I will just pretend that everyone oooh-ed and aahhh-ed over them at the wedding.  Check out a few photos of our program assembly.


Hammering nail holes into the program pieces.
I learned this technique sewing scores when I was a student worker at the library.
Who knew I'd use my mad skilz again!


Stephen is a happy helper!


And the finished product!  B-utiful!


*Not true