Showing posts with label Paper. Show all posts

Monday, January 17, 2011

The best card I've ever made - the iPad card.

Do you ever make something, and you're so excited about it that you want to tell everyone you know about it?  That is how it was for me with this card.  Except I made it as a surprise for my husband so I couldn't put it up on the blog right away.  And then I got distracted.  And then it was like 6 months later, and I realized I never shared it.  Well today is the day!

Check out the coolest card in the entire world, made by yours truly:


 Ok, ok.  I know not everyone is a mac person.  And I know that there are people out there who think iPads are dumb.  Still, you have to admit this is a cool card! BTW - it is the size of an actual iPad - I know right?  Awesome!

  I made this for Stephen for our first anniversary back in July.  He is a huge apple fan, and was saving up for an iPad at the time, so I thought it was appropriate.  I on the other hand, don't care all that much about apple, so I had to secretly surf the apple website, looking at all the iPad pictures I could find, and looking up all the dimensions I could to get my card as realistic as possible.  Well, at least as realistic as and iPad made out of cardstock could get.  And then I would lock myself in my craft room, and tell Stephen "You can't come in - I'm working on your card!"  He probably thought I was nuts,  because I was in there a loooong time...  ANYWAYS - I'm super excited about how it turned out.

 I felt super clever writing out my message using app icons.  I had to browse the app store looking for icons with letters that fit my needs, but of course I had to adapt some of them (thank goodness for all the apps with big blank spaces to write on!)

I even tried to preserve the placement of the apps as they were on the apple website's iPad picture.  I had to move some of course.  My art skills aren't fantastic, but after hand drawing all these apps I'm pretty pleased with the results.  Also, I tried my best to replicate the stock photo that is the iPad's default background.

Angry birds anyone?

The heart above the email means you've got love letters waiting in your inbox!

For the date I put our anniversary...  Now I wish I had put Saturday since the wedding was on a Saturday, but that's not really a big deal.


And I had to go out and buy a new set of colored pencils so I'd have a white one to put the time/wi-fi/battery on the top.  Full battery and wi-fi signal!  I thought I had written the time of our wedding ceremony, but then I remembered it was at 2:30...  oops!


This is my favorite part of the card.  The button is an actual button!  White embroidery thread looped through it to make the little square.  Sometimes I'm so clever I just can't believe myself!


Inside was a little apple logo...

Sorry guys, this message is private!

...which was actually a little pocket which I stuffed with CASH! (To go towards the purchase of a real iPad)

Real money was included at the time of presentation.

And on the back of the card, I used a silver sharpie to draw the apple logo and a sweet sentiment. Awww!


I put a lot of work into this iPad.  It took a lot of cutting and gluing (there are so many layers of cardstock going on - it is very hard to cut out clouds!) Now that Stephen has a real iPad, I can barely tell the difference...


The real one is on the right.  You're welcome ;)

Monday, January 10, 2011

My Crafty Christmas

I'm back!  My bloggy friend Jamie reminded me that it's been a month since I've last posted.  Oops!  Not really what I intended to happen, but you know how things kind of get away from you... Good thing I have people keeping up with me, or you'd all still be left without my wonderful internet presence ;)

I thought a good way to get back into the swing of blogging would be to let you in on what I've been up to in my time off.  It seems like things have been going non-stop since Thanksgiving.  We hosted this year's Thanksgiving dinner at our house this year, and it went off well, but as soon as it was over Christmas kind of took over and then before I knew it, Christmas was over, and then it was time for New Years, when we had our friends over for a couple of days. And then we had Stephen's birthday this weekend.  Whew!  Lots of activity - it was all a blast though.

Don't worry - I did manage to get some crafting done during my busy time!  Here's a quick rundown of what I did.

First of all, I promised my mother-in-law I'd take a picture of our Christmas tree for her so here it is (Sorry for the delay Suanne!)  I made sure to take the picture before I shipped off all the gifts.  It was pretty bare under there for most of the time we had the tree up.


And here are a few close ups of my handmade ornaments in action:


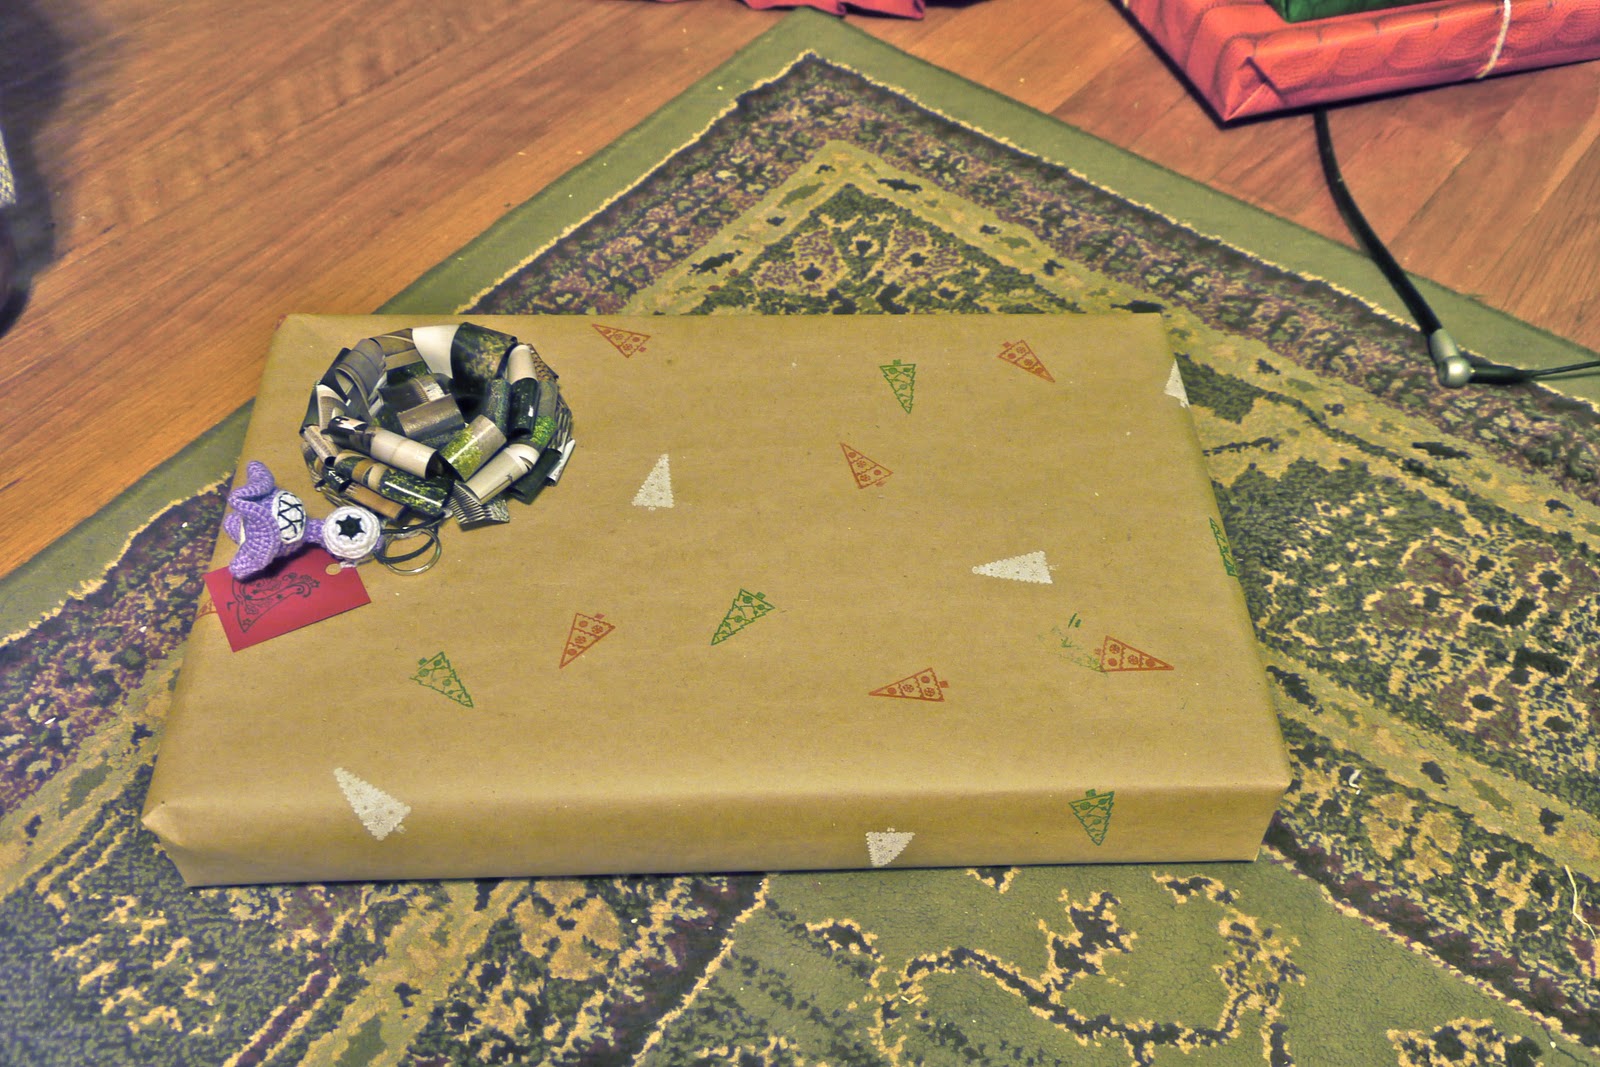
For my gift wrapping, I made a big roll of hand stamped kraft paper.  It came out so cute!  I love it!  I also used a bunch of hand made gift bows on my packages.  I think I'll post a tutorial for the bows one of these days.  They are pretty simple and cute! Here's a close up of the paper and bows:


Just curious, but did anyone else fall in love with this sweater wrapping paper in the dollar bins at Michael's as much as I did?


Oh my goodness!  It's so cute!  I had to keep myself from buying like 50 rolls of it.  I also decided to put yarn bows on all of my presents I was shipping this year, that way it wouldn't make a difference if my bows got squashed in the mail.  Great idea right?  Oh, and I don't think I took any photos of the gift tags, but they are all handmade too, you can see them a little in my present shots.

Here is my stack of gifts at it's most impressive looking point.  Beautiful!! Well, at least I think so.  Maybe next year I'll just wrap up a bunch of dummy boxes to put under my tree so I can look at a cheery pile of presents for more than a few hours.


Next, here are the Christmas cards I made for my co-workers this year.  It is important to me to give handmade Christmas cards, but my list is just too long.  So for the past couple years I've made up just enough for work people, and everyone else gets the pretty photo cards.  Here's this year's card:


A cute little forest of trees!  Here is a closer shot:


I sewed fabric scraps onto card stock using my sewing machine, then stitched around the edge and then sewed a few button ornaments on each one before sticking the card stock on to a blank card.  Then I put a hand stamped message on the inside:


Ahh!!  I'm totally in love with how they came out!  Sooooo cute!  (Sew cute?)

And, since I never posted it, here's the 2009 model:


Kinda the same idea but with a hand carved tree stamp instead (all the ornaments were mini hand-carved stamps too!)

Let's see... What next.  How about the crafty gifts I made.  I'll start with the nesting doll pillows I made for my mom and my sisters.  We've kind of got a running nesting doll gift thing going in our family, so it seemed appropriate.  I made these from a pattern I made up all by myself.  Go me!  I've still got a couple more to make, but I just couldn't get them done in time for Christmas.  Here are the ones I did get done.


Cute right?  Then this set of note cards went to my aunt.  These were kind of fun to make because it isn't 4 individual stamps, it is one stamp inked with 4 different colors.  That was kind of tricky!


My sisters-in-law each got one of these cute boxes:


Which held cute earrings!  I'm learning how to make jewelry now - Yay!


And my nephew got a stuffed "One Yard Wonders" dinosaur.


And my mother in law got a cute flower pillow (I love this pillow so much!  I have one of my own on my guest room bed! I've actually got the photos to post a walk through for this one - hopefully I'll get it up soon.)


Then, my niece turned 3 last week so I made her this cute card:


To accompany her new handmade fishing toy!


This was really fun to make!  This project was inspired by From An Igloo.  What a great idea right?  It's little stuffed fishies (I just sketched out a simple fish pattern).  Each fishy has a washer attached to it's nose, and there is a magnet inside the felt worm.  I kind of wanted to keep it to play with on my own.  Stephen demonstrated the proper fishing technique for me.


I also stitched up a quick drawstring bag for her fishies to live in.  I found the perfect fish fabric at Hobby Lobby too!


That's about all I've got!  And that's only the stuff I remembered to take pictures of! I'm exhausted just thinking about it... :)  And just for fun, and because Stephen took these photos, and I forgot about them, and I don't usually post photos like this here, here are a few pictures of me hard at work.

This is me making cards at my crafting table crafting table - it is usually about this jam packed full of stuff.


And here I am sewing buttons at the sewing table.  Wine is always a good accompaniment for crafting!  And this is my standard crafting attire.  Gotta love the pj pants!


Here's to a new year of blogging!  Hope it's a good one!

Friday, November 12, 2010

Ornament Month! Decoupaged Ornament

Today's ornament is a lovely decoupaged ornament!


I started with one of my clear glass baubles (actually I reused one that I screwed up from another ornament idea...) Then I pulled out my stack of gardening catalogs and cut out a bunch of pictures of white flowers.  I trimmed them as close to the blooms as I could with my embroidery scissors. Next I Mod Podged them (glossy) all over the outside of my ornament.  At this point I thought maybe white was not a good color choice, since my flower pictures started to get see-through when I podged them.  However they dried back in their original state.  Yay!  I also just let the pictures wrinkle however they wanted, and squished them down as flat as they would go.  Does that make sense?  Then I gave it a good coating of podge all over the surface.  Done!

I feel like this ornament doesn't come across that well in photos.  Trust me, it looks great in person! Here's a photo of the other side - lovely lovely lily!


This ended up being a fun but very messy project (Who doesn't love peeling the mod podge skin off of your hands?), but I'm totally happy with the result!

Wednesday, November 10, 2010

Ornament Month! Fanned Security Paper Ball

 For today's ornament, I whipped out my collection of security envelopes - this time, I only chose the blue ones.  Here's what I did:

1) Trace circles onto your envelopes.  I used the top of a small tin for mine, it was probably about 3 inches in diameter.  I don't know how great I am at eyeballing measurements though.


2) Cut out all your circles.  I think I had about 24 in all.


3) Fold all your circles in half.


4) Take your glue stick and start gluing your halves together,


       like so:


5) Once you have all your circles glued together, set them on an edge somewhere to dry.  The edge of my stamp box worked nicely.  Don't glue the two ends together yet though!


6) Ahh! I didn't take pictures of this part - try to use your imagination ok??  Cut several lengths of embroidery thread in various shades of blue, fold them in half, and tie a knot in it about an inch and a half from the folded end to form your hanging loop.

7) Put the loose end in the center of your paper fan ball and glue the remaining two sides together.

8) Tie a knot at the bottom of the ball to keep it from sliding off the thread.

TADA!  You're done!!

I'd say this ornament turned out pretty well, although I didn't do a super excellent job with my gluing, so the ball is a little loose in some areas.  Looks kind of like a Chinese lantern to me.  If I were to do this again, I'd use fewer circles.  Maybe something like 16?  Mine is a little too full for all of the fan leaves to be seen.  Not bad for just throwing together a few things I had lying around, huh?

Monday, November 1, 2010

Ornament Month! Yahoo!!

First of all, let me apologize for the lack of crafts last week.  Things were a little crazy!  Stephen has been working on a paper for school, so my computer time is limited, and I've been double busy at work lately, so my brain is pretty much shot by the time I get home, which keeps me from being in a particularly craft mood...  But enough excuses! Let's just pretend I didn't post any crafts last week because I've been so busy preparing for...

Ornament Month!

That's right!  I'm declaring November to be ornament month on Full of Craft.  I always say I'm going to make Christmas ornaments every year, but when it comes down to it, I don't actually get any done.  I decided to put an end to that this year.  I will try to have a new ornament up every M-W-F, and maybe even the in between days too.  Some will be my very own creations, others will be linked to wonderful tutorials I've found out on the web.  I hope you're as excited about this as I am :)  And don't worry - if you really hate ornaments, I do plan to have one or two non-ornament posts throughout the month.

Enough talk!  Let's get ornamenting!
I decided to start with something simple.  Allow me to present the curly security paper ornament:


I can't remember where I got the inspiration for this one - let me know if you think I should be giving you credit!   Anyways,  I'd seen lots of tutorials where clear glass ornaments were filled up with various things, so I decided to put some more of my security paper collection to use.  All I did was cut lengths of security paper about 1/2 inch wide, and curled them up around a chop stick.  Then I just popped them into the ornament.  Done!  You could of course do this with any old kind of paper you have lying around that you like the look of.  Enjoy, and I'll see you soon for more ornament fun!

Monday, October 18, 2010

Hand Stamped Wrapping Paper


Since the holidays are fast approaching, I thought it would be fun to share some of the fun new crafty wrapping techniques I've been trying out.  One that I really enjoy is hand stamped wrapping paper.  A few months ago I decided I'd really like to start wrapping everything in brown paper and focus on bows and other embellishments instead of the predesigned patterns of paper available.  Then I thought that it would be really cute to stamp onto the brown paper to make my own designs.  It is a little extra work, but I think it's worth it for the cute factor :)

Here's a quick tutorial for you (not that I think you really need one, it's a pretty basic concept, but it will be good tutorial writing practice for me.)

First cut the size of paper you need from your roll.  Unless you want to wrap a bunch of presents in the same stamped design, then go ahead and cut a bigger piece.

Next lay your paper out flat.  Mine tried to curl back up on me so I weighted the corners and sides down as needed to make it lie down flat. 

Then just stamp as desired - this is the fun part :)


 I like to let mine dry for a little bit so my stamps don't smear, but you might not need to do this step depending on the kind of ink you use.

Now all that's left is to wrap your gift. 


Tada!  Super cute and fun! My brown paper is kind of thick so I wrapped it with packing tape, but plain old scotch tape should work fine.  Probably not the method you want to use if you're a last minute gift wrapper though...

Monday, October 4, 2010

Rainy Day Note Cards


 Sometimes I sit down at my crafting table and I want to make something, but I don't know what.  That is usually when I decide to make a set of note cards.  Making note cards is quick, easy and satisfying!  I like my cards really simple, so I'm always able to come up with something I like with little more than a stamp and a some glue.  I always start with these:


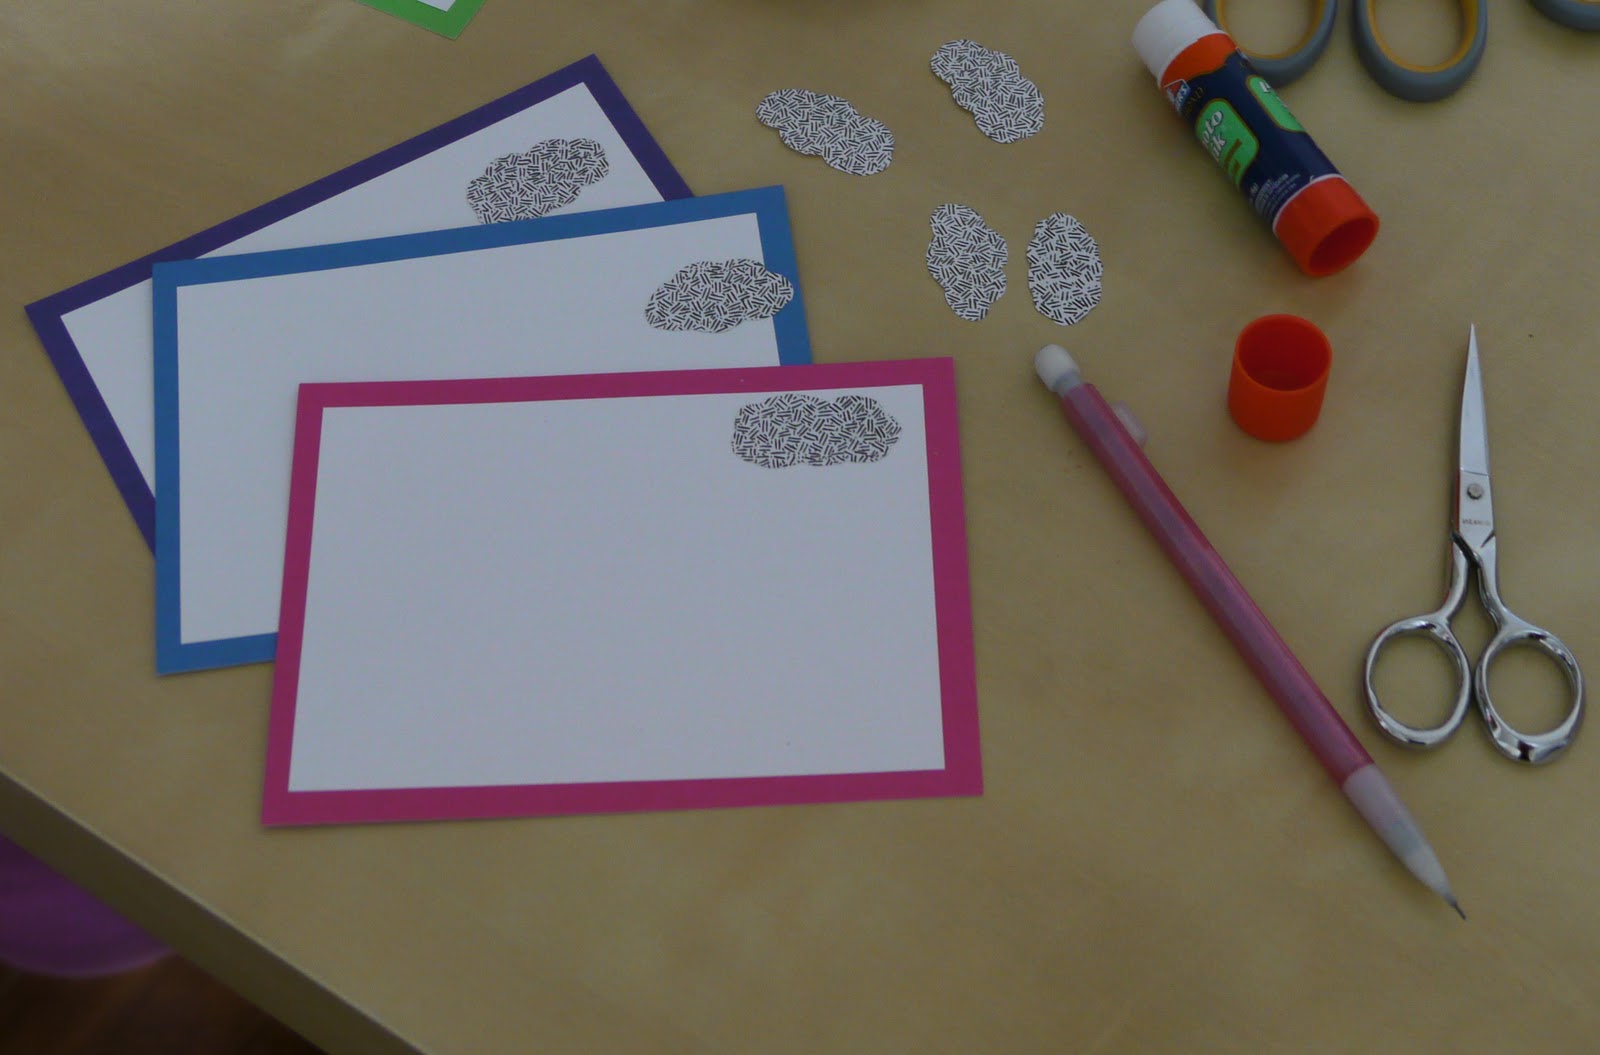
 This is a great set of note cards I picked up at Target sometime last year.  Two-hundred cards for $10.00!  It's just a box of colored cards with a matching envelopes.  I mean, the colored envelopes alone make it worth it for me.  The cards themselves are a little too plain to use on their own, especially the darker colored ones, so I started adding to them a little.  For this set, I decided to cut into my supply of security paper.  I thought to myself, "What is something that can use exclusively the colors blue and black."  First I came up with bruises of course, but that doesn't make a very nice card, so next I thought of a raincloud.  Perfect!

  I start all my cards by gluing a white panel on top of the colored card.  I just use a glue stick, or double sided tape, or whatever I have lying close at hand.  Then for each card I cut out a cloud out of the black paper and glued that on too.


 Next I cut out a whole mess of little raindrops.  This was a major pain in the butt.  Enough so that I decided to buy a raindrop shaped whole punch.  The next set of rain cloud cards will go much faster I'm sure...


 Then I glued 6 drops onto each card, wherever I thought they looked good.  Then Voila - done!


 I think they turned out really cute. Maybe to you rain clouds are a little gloomy for a note card, but I don't think so.  What do you think?  Too dreary?