
Did I mention in my bottle cap tacks post that my husband drinks a lot of beer? Not the "I'm drinking as soon as I get home until I go to bed" kind of beer drinking. And actually as beer drinking goes, he probably doesn't drink all that much. That's actually a bad way to start this post. It makes my husband look bad. He's not a lush or anything. He just enjoys beer, much more than I do is all. Anyways... I have tons and tons of bottlecaps. In fact, I have some very cool bottle caps sent to me by a sweet and friendly fellow blogger that I will hopefully be posting about soon so stay tuned for that!
Anyways, these were made before I got my super fun Australian bottle cap stash, and I haven't been able to post about it since I made this as a birthday gift for my sister and brother-in-law, and they just received the box in the mail this week. I should mention that I'm the worst package sender in the entire world - their birthdays were in May. Now it is July... ouch. Sorry guys... On with the craft!
I made a few sets of bottle cap magnets. They are pretty similar to the bottle cap tacks I made. I thought I'd give you a loose tutorial for them, just in case you wanted to make some of your own.The boy set is just plain bottle caps, the girl set has some embellishment. It's pretty easy, and you might have ideas that work better than this, but here's what I did.
My supply list:
- Bottle caps
- Round magnets - I think mine were 3/4 inch diameter, it doesn't really matter as long as they fit inside the caps
- Scrap cardboard
- Scrapbook papers and punches (for the girly set)
- Mod Podge (for the girly set)
- Tacky Glue
- hot glue
First, I remembered that my tacks sank into my bottle caps a little more than I wanted them to when I made them, and I didn't want the same to happen with my magnets. I was afraid if they sank in too far the sharp edges of the bottle caps would scratch up my refrigerator. My solution was to add a little cardboard base underneath each magnet. Cheap and easy! I cut out small scraps of cardboard that fit inside the magnet.

My cardboard was pretty thin so I used 2 layers inside each cap. I decided to tacky glue these together, and then tacky glue them into the caps. I thought about using hot glue, but I was afraid that might separated from the cap or something. And I didn't want to dig the glue gun out of the drawer just yet...
Regardless - I glued my bases into my caps and left them to dry.

This next part is for making an embellished set of magnets only. If you want your beer caps to look like beer caps you can skip this part! I decided to make my sister's magnets cuter than just plain beer caps. I added some cute scrapbook paper and little heart punchouts! I got a little heart shaped punch in the Michael's dollar bin a while back. I think I even had a 20% off coupon, so you really can't beat that! I'm glad I got it when I did because now all they have in the punch bin are angels, feet, and cats.
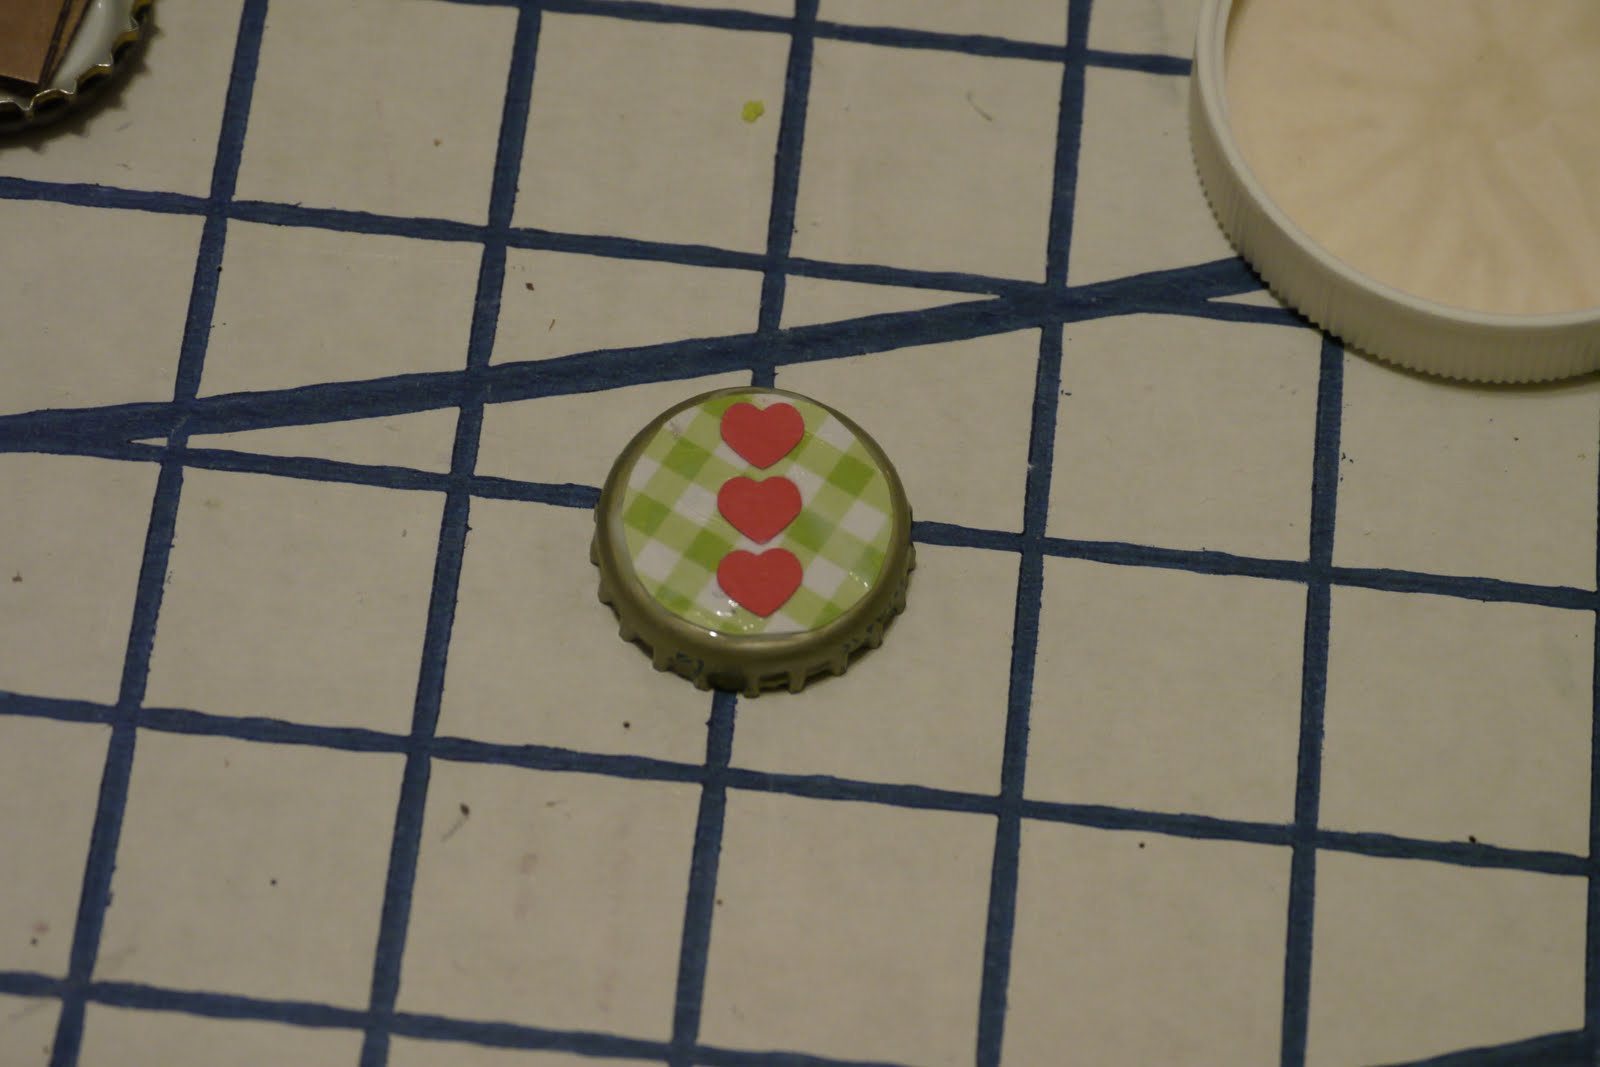
To attach the papers to the caps I used my old buddy Mod Podge! First I podged down the circle background, waited for that to dry, and added another layer and stuck on the hearts. After that was dry I put another layer of Podge on top. I think I added 2 or 3 layers on top of that - letting it dry between each step. Much like grandma recipes, I just added layers till it looked right.

Once everything was dry, the final step was to hot glue the magnets into the back. I realized I don't have any photos of this part, probably because you have to work kind of fast with hot glue. I just filled the cap up partway with hot glue and added the magnet, adding more glue where it looked like it needed it. Be careful with this, because the caps will get HOT! They are metal of course and metal is an excellent conductor of heat. I also found, that if you set your hot Mod-Podged bottle caps cute side down on an old shutterfly envelope to dry, they will stick to the envelope, and orange stuff will get stuck to them which you will have to scrape off later. I was able to get most of it off and they looked fine after another layer of Mod Podge was applied.
I think they turned out super cute! Don't you?

I actually made two sets of plain magnets, one for my BIL and one for my husband.

This is the one I made for Stephen - it's extra special because we got the Piton cap on our honeymoon. Awwww! Mmmmm - St. Lucian beer! And here's a fun fact: our tour guide taught Stephen how to open a beer bottle with a seat belt!
If you or your SO is a beer drinker, this might just be the craft for you! Just remember folks - drink responsibly!


2 comments:
Love the girly set! How cute!
How can I drink responsibly now that I know I can open my beer wiht a seatbelt!?!?!
Post a Comment