Showing posts with label Mod Podge. Show all posts

Friday, November 12, 2010

Ornament Month! Decoupaged Ornament

Today's ornament is a lovely decoupaged ornament!


I started with one of my clear glass baubles (actually I reused one that I screwed up from another ornament idea...) Then I pulled out my stack of gardening catalogs and cut out a bunch of pictures of white flowers.  I trimmed them as close to the blooms as I could with my embroidery scissors. Next I Mod Podged them (glossy) all over the outside of my ornament.  At this point I thought maybe white was not a good color choice, since my flower pictures started to get see-through when I podged them.  However they dried back in their original state.  Yay!  I also just let the pictures wrinkle however they wanted, and squished them down as flat as they would go.  Does that make sense?  Then I gave it a good coating of podge all over the surface.  Done!

I feel like this ornament doesn't come across that well in photos.  Trust me, it looks great in person! Here's a photo of the other side - lovely lovely lily!


This ended up being a fun but very messy project (Who doesn't love peeling the mod podge skin off of your hands?), but I'm totally happy with the result!

Friday, September 10, 2010

How to make a box into a different box

Once upon a time, I was trying to organize my craft supplies and realized I had a problem.  The problem of too much stuff, and nowhere to go with it.


My favorite way of cleaning up (or at least what I find most effective... I hate cleaning up) is putting everything all in one place and then putting it away.  So I did this on my crafting table.  Then I realized I had all my pens, scissors, rulers, various other tools crammed into one tiny little kitty planter (see upper right hand corner of photo) and still needed to cram more stuff into it to get it put away.  Yeah, not gonna happen...  Also, all of this stuff has gotten back to it's proper home now.

I decided what I needed was a special box just for "crafting tools" so the kitty could be dedicated to pencils and pens.  And you pretty much have to keep your crafting tools in a box you crafted yourself, right?  It just so happens I had the perfect box in mind!

(Pretend I took the picture before I cut the top off...)

I have a bad habit of keeping every "good sized" box I get, "just in case" and I remembered I had this one, I think from a candle fundraiser.  I guess sometimes my hoarding comes in handy!  Don't turn me in to TLC though,  I do throw stuff away occasionally!!!

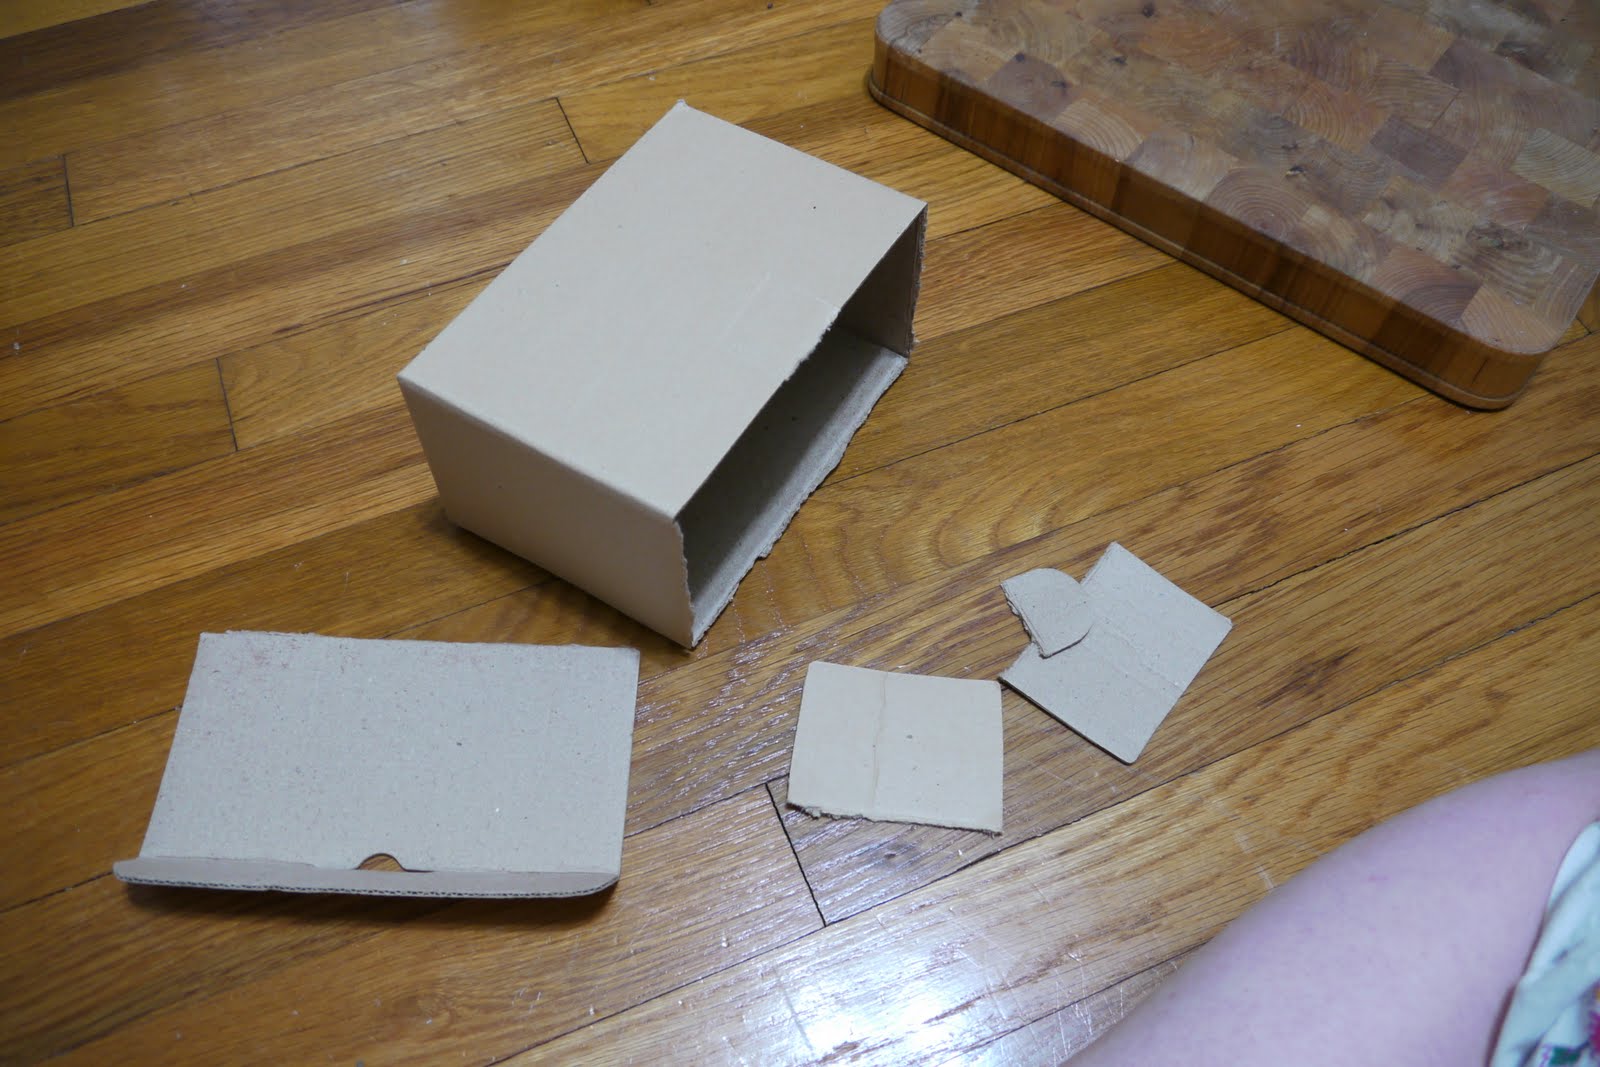
After I had located the perfect box I chopped off the top and side flaps, plus the little "closure tabby"


I saved the top to make a divider for my box.  I wanted it to have two compartments so my paintbrushes and such didn't fall over and get lost in the bottom.  So I sliced the top to the right height with my most beautiful box cutter.

Tools don't have to be ugly!

Voila - perfect height!  I also used the piece I'd cut off to act as extra support for my center wall. 


Originally I had planned on covering my box with scrapbook paper, quick and easy, stick it to my box with double sided tape. However, none of my pretty papers were speaking to me.  That's when I remembered I had this box...


Which, I'm sure you can tell is full of...


Book Pages!! (leftover from this project - hoarder alert)  All the sudden this had turned into a mod podge project! 

Hooray for Mod Podge!

I prepared my workspace (Ikea cutting board) for the impending mess. I also tore up a bunch of my book pages.  I like that rough look, plus it's a boring book so no one would want to read whole pages off of my box anyways...

R-E-C-Y-C-L-E Recycle!


First thing I did was coat the bottom of my box with Podge. 


Then I realized this was a dumb idea and coated each individual piece of paper before I stuck it on.


Next I got messy and splattered some Mod Podge on my shirt, so I took a break to change into something I didn't plan on wearing to work again.  You can skip this step if you aren't a major slob.


I continued covering the inside of the box, and over the top edge like so.  I also covered my inside walls and left them to dry.  I didn't do the whole thing the first night because I didn't want the box to glue itself to my cutting board (although the walls did that a little bit anyways...)


Next morning it was looking good!!


The next night I set to work on the rest of the box.  My husband decided to take a few action shots.  Probably a good idea, because then I didn't get Mod Podge all over his camera. 


I also wore an apron this time.


Then I left that to dry overnight. I also glued the two wall pieces together in preparation for wall installation the next day.    Once I got to this point I realized I'd done a lot of extraneous gluing and podging, since I was going to end up re-covering the whole wall piece once I'd put it in the box.

A totally unnecessary step...

especially since I dropped it glue side down on the floor...

But check out that lovely wall!


I podged more paper over all the edges of the wall, and then gave most of the inside another good coating of the stuff.


Then I just let that dry and voila!  I'm done!!


It was everything I ever imagined it could be, and it looks great on the corner of my crafting table!


I think the kitty is happy about it too!

Friday, July 30, 2010

Fun Rolled Paper Beads

If you read a lot of craft blogs, you probably already know about making paper beads.  I think it is such a cute fun way to make unique beads, and you can coordinate them to any project!  As long as you can find coordinating paper that is.

I apologize in advance. I don't have an overabundance of pictures of this project.  About five minutes in to this project my hands were covered in Mod Podge, so I decided it was in my best interest not to put my hands all over Stephen's fancy expensive camera.  I'll try to be descriptive though, just in case you haven't heard of paper beads already :)


For this craft project I cut skinny strips of scrapbook paper.  I think they were maybe a quarter of an inch wide, and the whole length of the scrapbook paper, tapered to a point at the end. Different shapes of paper will make different shapes of beads, so feel free to experiment with non-triangular strips!

I think this would be way easier to do with a wider strip, but I wanted my beads pretty small.  I rolled my paper up around a toothpick applying mod podge to the paper as I went.  I tried to only put it on the inside at first, but it occurred to me it didn't really matter where I put the mod podge, since I'd be rolling it all up and coating the bead in the stuff when I was done anyways.  So go ahead and get the podge all over everything - it won't be a problem!  One thing you do need to be careful of is not to glue the paper to the toothpick.  I tried to slide the bead back and forth on the tooth pick every few rolls to make sure it didn't stick.


After my beads were rolled up tightly, I slid them off of the tooth pick and put them on my specialized paper bead drying device (one of my rolled felt pincushions with pins sticking out of the sides).  Once they were on their pin skewers, I gave them a coating of Mod Podge so they would have a nice solid outside.  You can sort of see in the picture how the orange and read beads haven't dried quite yet.

Once they are dry you can use your beads for whatever you want!  I used mine for wine glass charms!


This is the set I made for myself.  They are kind of yucko because I used a black gel pen to mark my cutting lines on the scrapbook paper.  They were pretty obvious when I rolled them up.  Ooops!  Didn't think of that!

I made another set for my sister - the picture is kinda blurry, but it's all I got! They came out much better since I put care into the cutting lines.  I'd go without cutting lines at all, but I don't really trust myself to cut "freestyle."


Now I don't have to worry about some gross face drinking out of my wine glass!  Unless it is a color-blind gross face I guess...

Cheers!!

Monday, July 26, 2010

Bottle cap magnets: Beercycling


Did I mention in my bottle cap tacks post that my husband drinks a lot of beer?  Not the "I'm drinking as soon as I get home until I go to bed" kind of beer drinking.  And actually as beer drinking goes, he probably doesn't drink all that much.  That's actually a bad way to start this post.  It makes my husband look bad.  He's not a lush or anything.  He just enjoys beer, much more than I do is all.  Anyways... I have tons and tons of bottlecaps.  In fact, I have some very cool bottle caps sent to me by a sweet and friendly fellow blogger that I will hopefully be posting about soon so stay tuned for that!

Anyways, these were made before I got my super fun Australian bottle cap stash, and I haven't been able to post about it since I made this as a birthday gift for my sister and brother-in-law, and they just received the box in the mail this week.  I should mention that I'm the worst package sender in the entire world - their birthdays were in May.  Now it is July... ouch.  Sorry guys...  On with the craft!

I made a few sets of bottle cap magnets.  They are pretty similar to the bottle cap tacks I made.  I thought I'd give you a loose tutorial for them, just in case you wanted to make some of your own.The boy set is just plain bottle caps, the girl set has some embellishment.   It's pretty easy, and you might have ideas that work better than this, but here's what I did.

My supply list:
- Bottle caps
- Round magnets - I think mine were 3/4 inch diameter, it doesn't really matter as long as they fit inside the caps
- Scrap cardboard
- Scrapbook papers and punches (for the girly set)
- Mod Podge (for the girly set)
- Tacky Glue
- hot glue

First, I remembered that my tacks sank into my bottle caps a little more than I wanted them to when I made them, and I didn't want the same to happen with my magnets.  I was afraid if they sank in too far the sharp edges of the bottle caps would scratch up my refrigerator.  My solution was to add a little cardboard base underneath each magnet.  Cheap and easy!  I cut out small scraps of cardboard that fit inside the magnet. 


My cardboard was pretty thin so I used 2 layers inside each cap.  I decided to tacky glue these together, and then tacky glue them into the caps.  I thought about using hot glue, but I was afraid that might separated from the cap or something.  And I didn't want to dig the glue gun out of the drawer just yet...
Regardless - I glued my bases into my caps and left them to dry.


This next part is for making an embellished set of magnets only.  If you want your beer caps to look like beer caps you can skip this part! I decided to make my sister's magnets cuter than just plain beer caps.  I added some cute scrapbook paper and little heart punchouts! I got a little heart shaped punch in the Michael's dollar bin a while back.  I think I even had a 20% off coupon, so you really can't beat that!  I'm glad I got it when I did because now all they have in the punch bin are angels, feet, and cats.


To attach the papers to the caps I used my old buddy Mod Podge!  First I podged down the circle background, waited for that to dry, and added another layer and stuck on the hearts.  After that was dry I put another layer of Podge on top.  I think I added 2 or 3 layers on top of that - letting it dry between each step.  Much like grandma recipes, I just added layers till it looked right.


Once everything was dry, the final step was to hot glue the magnets into the back.  I realized I don't have any photos of this part, probably because you have to work kind of fast with hot glue.  I just filled the cap up partway with hot glue and added the magnet, adding more glue where it looked like it needed it.  Be careful with this, because the caps will get HOT!  They are metal of course and metal is an excellent conductor of heat.  I also found, that if you set your hot Mod-Podged bottle caps cute side down on an old shutterfly envelope to dry, they will stick to the envelope, and orange stuff will get stuck to them which you will have to scrape off later.  I was able to get most of it off and they looked fine after another layer of Mod Podge was applied.

 I think they turned out super cute! Don't you?


 I actually made two sets of plain magnets, one for my BIL and one for my husband. 


This is the one I made for Stephen - it's extra special because we got the Piton cap on our honeymoon. Awwww!  Mmmmm - St. Lucian beer!  And here's a fun fact:  our tour guide taught Stephen how to open a beer bottle with a seat belt!

If you or your SO is a beer drinker, this might just be the craft for you!  Just remember folks - drink responsibly!

Friday, July 9, 2010

Recycled Crafts - The Security Bowl


Oh junk mail.  I hate you, the world hates you.  It's amazing that you don't have bad self esteem!  Except I don't hate junk mail anymore - I know right?  What a weirdo I am.  It's not very green of me, embracing the junk mail, but I don't care. And why is that?  Because each one holds the possibility of a hidden gem inside.  The hidden gem of Security Paper! You know, the inside of the envelopes that are marked with some wacky design so you can't tell there's a check in there (or the offer of a lifetime in the case of junk mail...)  And lucky me!  It is my job to open the department's mail at work, so I not only get the security paper from my home junk mail, I get to security paper from my department's junk mail too!  I find it funny that the letters that are actually important rarely have secure envelopes, but that's another story... Oh, and I do have more responsibilities than just opening the mail by the way.


Now you may be wondering, why is security paper anything to care about? Well, I'll tell you!  You'd be surprised at how many different designs are inside those envelopes.  How could a crafter not get excited about so much pretty paper when it's FREE!  So I started saving all the envelopes I could get my hands on (let me tell you, you walk a fine line when you start saving garbage for crafts... If you aren't careful, pretty soon you'll end up on hoarders).  I had seen a tutorial for a fabric bowl that I wanted to try, and also tons of tutorials for security envelope projects so the two melded in my mind and I decided to make a security paper bowl!

For this project you will need: assortment of security envelopes, mod podge - glossy or matte is up to you, mod podge applicator of your choice, a bowl you like to use as your mold, and plastic wrap.  I think that's it.  I basically used the same process as the fabric bowl tutorial, but used paper instead of fabric.

I started with my old friend Mod Podge!  I love you mod podge, you make so many wonderful projects possible!


Then I covered my "template bowl" with plastic wrap to form my mold for my new bowl.  FYI - this step was SUPER annoying.  The sooner you accept it's just going to be totally wrinkly, the better.  I tore open all my security envelopes (carefully) and cut them up into little pieces and I was ready to go!  


I must be crazy to do a mod podge project wearing a nice dress...


The next step is to slather that Mod Podge onto your plastic wrap covered bowl, nice and thick, and put your paper pieces, pretty side DOWN on the bowl to make your inside layer.  I did not use my mod podge sparingly.  I think this will make for a stronger bowl in the end, but since I've only made one, I really have no basis for comparison.  After you do that layer, you make another layer with the pretty side facing outward for your outside layer.  My husband borrowed a tripod from work for a different project, and he was eager to play with his camera, so we even got some crafter-in-action shots on this project!  Awesome!  Sorry everyone, but I did this project on the dining room table, possibly the darkest place in our house.


Slathering on the first layer of mod podge
 The first paper scraps going on...

 Wow!  Now all of the inner and the outer layer has been applied!

Then after that I think I spread on another good thick layer of podge and left it to dry.  It takes a good couple three days to dry completely so be patient!  Then wriggle the bowl off of the mold (this can be a little tricky) and TADA!  You're done!

The end result, after I trimmed the edge, was a pretty sturdy little bowl, albeit a little... squiggly?  This could maybe be remedied with a little more practice, or a little more patience in letting the thing dry, but I'm happy with the end result!  In fact, I saw some paper mache bowls in a home magazine of some sort, and they were a little squiggly too, so I'm not upset with my results at all.


It's nice to know that with all this security paper, no one will ever be able to tell what is inside this bowl!

Monday, July 5, 2010

Mod Podge: My new favorite thing!


Let's have a warm welcome to the newest member of my crafty family, Mod Podge! Oh Mod Podge, I wanted to buy you for such a long time but you were so expensive at Michael's and Hobby Lobby, at least for a cheapo like me.  Then I saw you for a lot less at Joann and I had a 50% off coupon, so you finally got to come home with me!  And oh how I love you!  You are perfect for so many wonderful projects. You may have kicked the tacky glue out of it's place of honor!
Yes, after ages of wanting to, I got myself some of this stuff, which has been around for longer than I have!  I've already used up a ton of this bottle, it's come in handy for so many things! So get excited people, there will be Mod Podge projects coming soon!!